
This instructable will teach you the basics of hand embroidery. Learning to embroider is not as difficult as you might think! With a little practice, you’ll get it down in no time. Embroidery is a great way to unwind after a long day if you enjoy doing crafts while watching TV Or listening to the podcast – I spend most of my nights embroidering! 😀 In this tutorial, I’ll cover running stitch back stitch split stitch satin needle stem stitch french knot as well as seed and fill stitches. These stitches are the backbone of embroidery – there are many more advanced stitches Also there. Once you get the hang of the embroidery stitches in this tutorial I really recommend you Google
or go to the library to learn more stitches. They are very addictive. Here are some other embroidery tutorials to get you started. Go to the last step to learn more! How to transfer Embroidery to Fabric Embroidery Hoop Photo Frame The Legend of Zelda Embroidery + Patterns Turn Embroidery Into Wall Hanging If you enjoyed this tutorial check out my Hand Embroidery Lesson! I will teach you everything I know about embroidery making patterns and more.
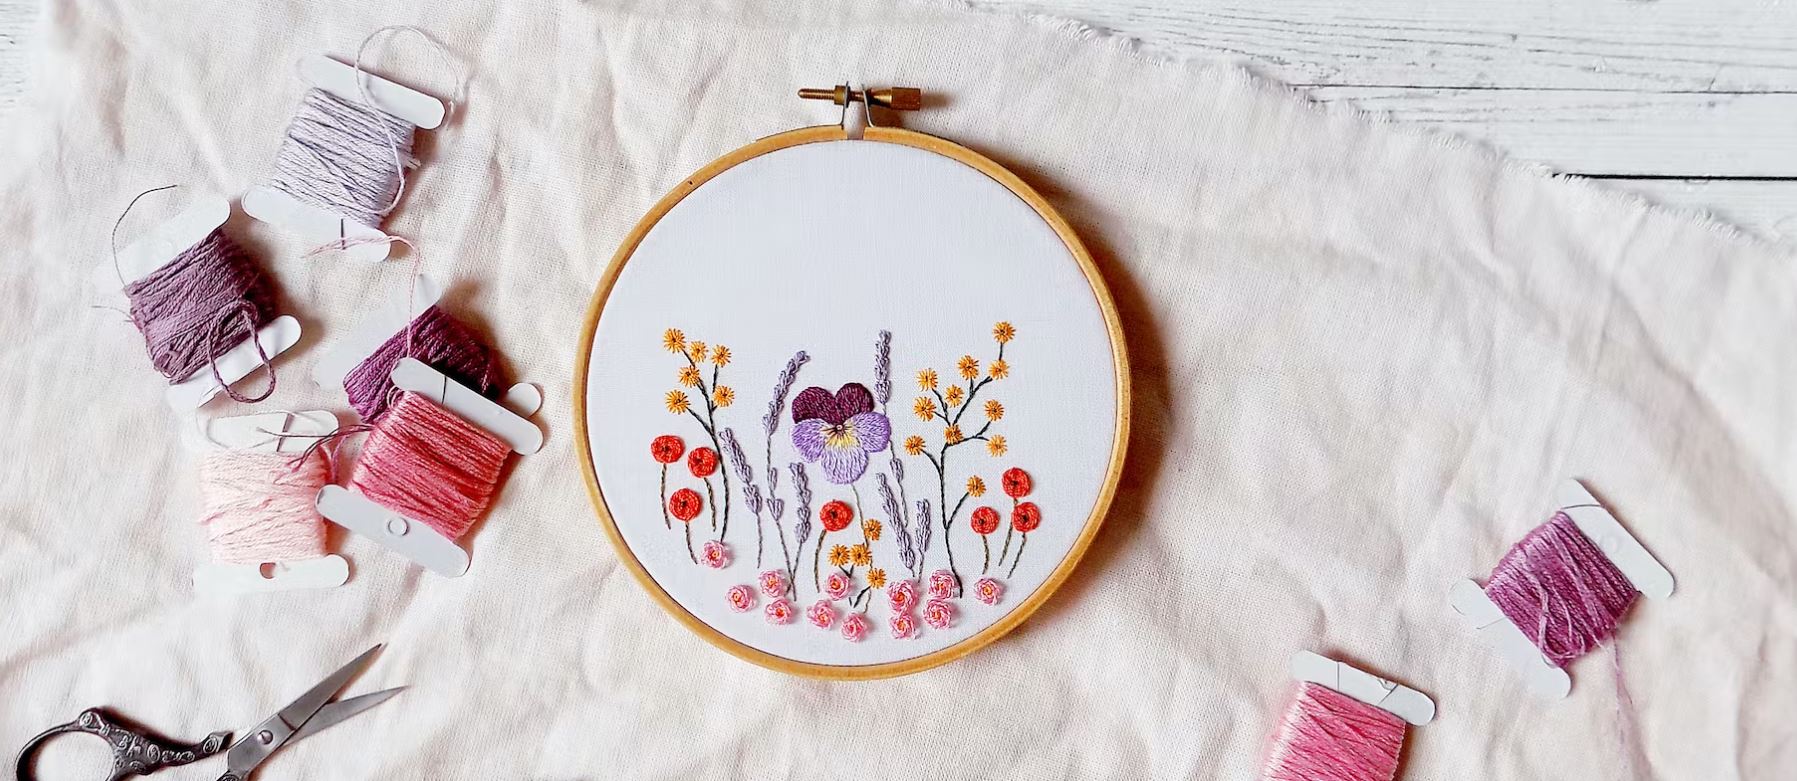
What do You Need to Start Embroidered?
To start embroidering you will need the following items: Embroidery Hoop – This is a two-part ring. You put the fabric between the hoops – this helps keep it taut and makes embroidery easier. These are plastic and wood – I prefer plastic for embroidery and wood Used to display embroidery. Small sharp scissors. You can find these under many names – although Googling embroidery scissors will get you what you need. : Your choice of fabrics! Linen quilted cotton canvas and osnaburg are both great options! It should not be too loose or too tight. Embroidery floss. It’s cheap and comes in a lot of colors. I prefer DMC floss and use it exclusively. Embroidery Needle. These have larger eyes than regular needles to accommodate the size of the floss. Water-soluble markers or other marking tools. so you can draw the design to your fabric! It’s best to use a water-soluble pen so you can rinse off your markers with cold water at the end. No matter what fabric you like! Muslin quilted cotton canvas and linen work well. I usually embroider on linen blends.
How to Use an Embroidery Hoop?
Embroidery hoops come in a variety of flavors although basic round wood and plastic are the most common. You can find them at most craft stores. 🙂 Cut a square piece of fabric slightly larger than your hoop. Start loosening the screws on the top of the hoop. Then you will separate the hoop. place Outer hoop to one side – we’ll be worried in a minute! (If you use a plastic hoop the inner hoop will have a lip. This lip can go over the top of the hoop or hang below the bottom. Your choice! See the last photo for how I assembled the plastic hoop.) Put this piece of fabric on top Ordinary inner hoop. After placing the fabric on the inner hoop push the top hoop down onto the inner hoop. This will sandwich the fabric between them. Now you need to tighten the screws a little and start pulling the fabric. The fabric floating between the hoops should not be very A lot – this will make the embroidery much more complicated than it should be. Once the fabric is taut continue tightening the screws until it feels secure. But not so tight you can’t budge! Once you’ve embroidered for hours and your fingers are sore you’ll regret it Unable to open the hoop.
Thread and Floss
Threading can be a little complicated at times. I’ve found the easiest way to do this is to wet the end of the floss (yes put it in your mouth.) and squeeze it with your thumb and forefinger. This will flatten it out and let it go through the eye of the needle with less Make a fuss. Also: Remember you don’t double the floss as you sometimes do with floss. You just pull the thread out of the eye and loosen it a few inches. You’ll tie the other end as usual. (and make sure to cut the loose stuff after tying the knots – it will give your Work neater! Never leave more than 1/2 inch behind the knot or it will tangle when sewing. ) Most floss comes in multiple strands. The most common is six strands. You can separate the floss for more detailed work. The best way is to use your fingernail to separate the strands then pull Separate slowly.
How to Do the Running Stitch?
Done as you would in regular sewing. You can make the stitches long or short or randomly placed according to your design. I use this stitch for framing and embroidery designs or where I want something that looks open and airy. I don’t recommend using it for text as it can also be a bit Spacey. You can do the standard up and down or thread the needle through and sew a few stitches at a time. For new embroiderers, I recommend using the up and down method until you get the hang of spacing.
How to Do the Backstitch
I’ve been using this needle for text. It makes the text easier to read and more uniform. I also use it for any outlines on the drawing as it makes the outlines crisp and clear. I use a slightly altered back stitch for the embroidery – it makes the back neater and leaves fewer dark lines to display in the front. This is the reverse stitch method for embroidery: Pass the needle through the front of the fabric and sew to the right. Bring the needle back to the front of the fabric one stitch length to the right then pass the needle through the back of the fabric using The hole at the end of the first stitch. (As shown in the second photo) Use the hole at the end of the stitch on the far right to bring the needle back to the front of the fabric. Repeat until done! You can reverse left or right – but try it right first to lower the tempo. As long as your stitches remain an even length it will look great! The most important thing about backstitching is to make sure you use the hole made at the end of the stitch to start the next stitch at any time. Look at the back of my back stitch – see all is well tidy? That’s exactly what you want. This way you can floss less and keep everything organized. These pictures may help you understand this more clearly!
Step 6: How to Do the Split Stitch
This is a great raised decorative stitch. It can be used like a backstitch and works much like one. I use it when I want something to have a little texture. For example icing on a cupcake tree covered with blurry animal flower outlines etc. For this pin, you need to pull the wire up And make a small stitch (preferably no bigger than a grain of rice!). Then you’ll go back through the middle of that stitch and return it a short distance out of the fabric in the direction you’re going in. It is best to keep your stitches very short (1/8 inch) to 1/4 inch. ) when doing this – otherwise your stitches will look messy and they won’t conform to the curves as you want them to.
How to Make a French Knot?
French knots are considered a nightmare for most embroiderers but I love them. They are so delicate and cute and they never look the same. They can also vary widely in size so you can use them in a variety of ways. (check the first photo – the top row is a french knot made with six strands of rope The second row was wrapped once with floss and the knot was wrapped twice! ) If you’re patient you can use them as the center of the flower as the eye of the polka dots or even as a line. 😀 I use them most often when I dot myself in text. To successfully tie a French knot you need to follow These steps: Pull the floss to the front of the fabric. Wrap the floss between the fabric and needle around the needle 1 2 or 3 times. (One for a small knot two for a medium knot and three for a large knot.) Hold the floss tightly so that it wraps around the needle. push with the other hand The needle goes through the back of the fabric very close to where the floss will appear. Continue to tighten the floss and pull the needle all the way. Practice it hundreds of times until it becomes second nature. 😀 You’ll tie these in the back as usual. For the cleanest job (if You are not making them! ) tied between each French knot. Otherwise, if the knots come apart you’ll have tails all over the place!
How to Do the Stem Stitch?
Stem needles are great for vine branch blooms and silhouettes. It also looks good for text but you have to be careful with sharp corners. Stem stitch is similar to the backstitch but instead of connecting stitches at the end, the needle is raised for the next Sew next to the last stitch. Make a small needle about a grain of rice long. As shown in the second photo pull the needle up through the fabric on the right or left side of the previous stitch very close to the end of that needle. Continue to start your new stitch in the same place The side of the stitch you have laid down. This stitch is easiest to practice with line drawing – when you try not to use line it can be difficult to know where each stitch should end.
How to Do the Satin Stitch?
Satin stitches are great for adding tons of color to your embroidery – filling in letters and shapes and all kinds of stuff! Satin stitch can be done in a number of ways. You can outline a shape with a backstitch and then fill it. You can do satin stitching yourself without contouring. you can also Backstitch the outline and then satin stitch all over it for slightly raised areas. To practice satin stitching start by drawing a simple shape on the fabric. Then use the back stitch to outline it. Then you’ll simply go back and forth on the shape (I always like to start in the middle but Its personal preference. ) until it is filled. Try again with the other two methods! The two most important things about satin stitches are: get as close to the outline as possible so your satin stitches look nice and full – you can always go back and fill in those bare spots with Seeds and straight needles but it’s easier to get it right the first time! Do not continue your satin stitch on the back of your piece. It will waste your embroidery thread and make your job bulky! To avoid this bring the thread next to the front profile for the first time left. Then place it next to the outline on the right. Instead of going over the left side of the fabric’s back profile just reposition the needle next to where you just pushed. This way you save threads and time.
How to Make Straight and Seed Needles?
These are similar to running stitches – you just don’t follow a line! The location is usually very random. Straight pins can vary in length and are ideal for filling areas with a lot of texture. Seed stitches are very small – you will only use these stitches! Seed stitches are most often used to fill areas. Straight stitches can be used for a ton of different things – filling things up to add detail shading etc. See the picture for a quick example.

No comment